What is the Sand Casting Process?
Sand casting offers versatility when creating three dimensional objects that have complex geometries and intricate pieces.
This process has been used for several centuries. Today, newer innovations have streamlined the sand casting techniques to accommodate low production and high production of parts, components and end products. Yet many people are not aware about how the sand casting process works.
There are typically six steps to the actual process. Yet these steps may have extra tasks involved depending on certain factors, such as whether a pattern will be used to create the mold, or if machining will be used to create the cavity into the sand in the desired shape of the product that will be cast — which is sometimes used for prototypes and product development when the design may change.
Design Pattern Creation
The pattern for the mold will be created based on the product’s specifications. In addition, the pattern that will be a replica of the actual product will be slightly oversized. This oversizing method is done based on the type of metal that is used and how it’s characteristics will change from a molten state to a solid state. Some metals will expand when heated and shrink when they cool. Other metals will do the opposite. Oversizing the pattern will provide room for the metal if it expands as it won’t break the mold.
Gates and Risers Creation
The pattern will also have gates and risers added when placed into the sand mold. Gates and risers are pathways leading to the main pattern and out of the sand mold. The molten metal will be poured into these pathways as it will flow into the center of the pattern mold. The pathways also provide other benefits. They allow gases that exude from the molten metal to vent. These patterns also assist with thermal contraction that occurs with the molten metal as it solidifies. The pathways allow the metal to fill every crevice so there will be no gaps for intricate pieces. If the metal expands, the extra metal will flow back into the gates and risers and not break through the walls of the pattern. When the metal contracts, the excess metal in the gates and risers can settle back into the pattern to fill every crevice.
Mold Creation
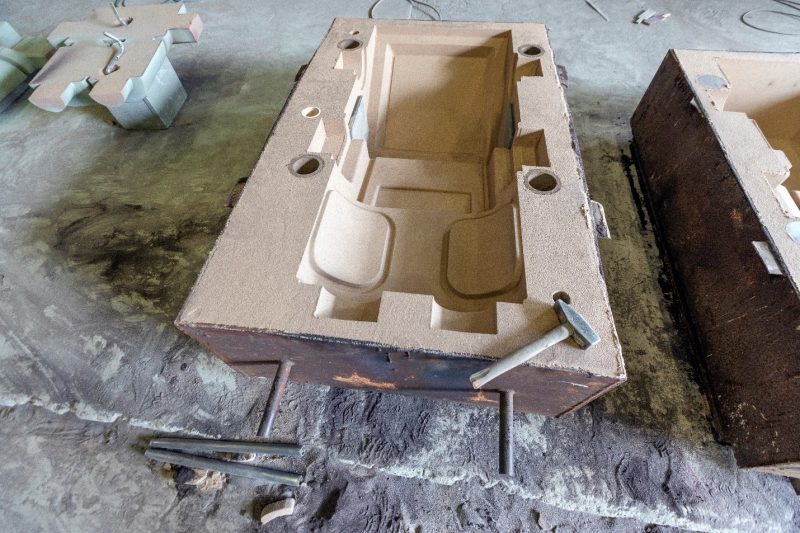
As the name implies, sand is used in the mold creation process. Sand has refractory properties, as it can withstand the heat while maintaining its shape. The sand will also typically have other materials added to it, such as bonding agents and clay, to assist with holding the mold together so it can undergo the pouring of the molten metal. The entire sand mold process is done within a box called a flask. There will typically be two parts of the box, a top part which is called a cope and a bottom part which is called a drag. These two boxes will be clamped together to make the 3 dimensional part.
The bottom mold box (drag) will be partially filled with sand as then the pattern and gating system will be added. A core, which is a type of shaped sand, will sometimes be placed inside to help shape some of the interior casting surfaces when the pattern itself doesn’t contain these features. To help support the core in place, core prints and metal pieces called chaplets are added. Then the top of the mold box, the cope, is clamped in place on the drag.
Then the drag box is filled the rest of the way with sand until the pattern, gating system and core are covered. The box is compacted to ensure that there are no gaps. Excess sand becomes removed as now the cope is removed from the drag so that the pattern and care can be carefully extracted.
Casting Pouring
With the pattern and cores removed, the created mold shape will be prepared for the molten metal. A type of lubrication will be added so that one the molten metal cools, the cast will be easier to take out as the lubricant can also help provide a better surface finish.
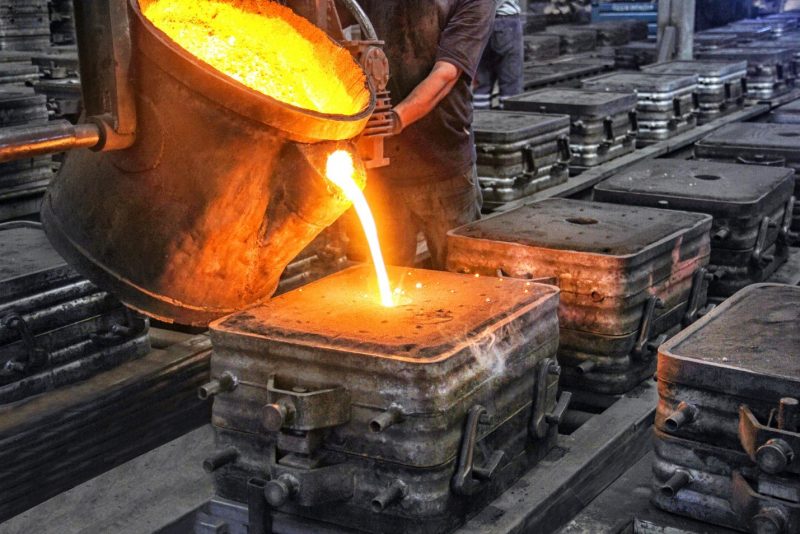
Next, the cope and the drag boxes are secured together. Weights will be used to keep the cope in place so that it doesn’t rise when the metal is poured inside. The metal now can enter the mold through the gates and risers. The metal is now allowed to cool.
Sand Shakeout
Once the metal cools and solidifies, the sand can be shaken from the drag and cope boxes. The sand is broken apart and is recaptured as it can often be reused.
Finishing
Once the metal part is removed from the flask, it will go through a final finishing process. This process involves cutting away all the gates, risers and runners connected to the metal part. Then the part will be sandblasted and ground to achieve the desired smoothness and surface finish.
By understanding the process that is involved with sand casting, customers will be able to determine if this technique will be suitable for the component and product creations. To learn more about Impro sand casting capabilities, please Contact Us today.